|
The
Double Time Technique
(My thanks to Barbara A.
Taylor for taking the time to describe this technique to
the stamping
masses. I have only altered her words for grammatical purposes.)
Check out
my Double Time Sheets page!
You can see full sheets up
close!
HOME
Here is a description that is more technical. It teaches how to use up the entire piece of cardstock without waste:
(In her own words....)
This technique is similar to collage but is not the same since you do
not
fill in the entire background. Think of it as creating "wrapping
paper"
(when completed it looks like it was cut from a larger image).
You will need:
2 background stamps (I use Little Shapes or The Shape of
Things)
2 image stamps (any semi-bold--bold line stamps), and 1 small
word/saying (small words from All Year Cheer sets work well).
The
way that
I was shown how to do it is:
Stamp 2 background stamps (e.g.
Little
Shapes, The Shape of Things) on the paper first. Starting with the
lighter color, ink your stamp and stamp repeatedly on the paper until
you
run out of ink.
Reink your stamp and repeat until you have a
variety of
areas on the page stamped. Repeat with another shape/stamp in
another
color.
Then choose 2 different (complimentary) colors and 2 image
stamps. Ink these as noted above and stamp in the same manner...both in
the
existing spaces and on top of some of the other background
shapes. Then
choose your words (not too big because you want them to fit into the
spaces on
the sheet). Stamp them in black (or any other vivid color) in the
spaces.
Out of one sheet, you can get a strip for a scrapbook page, a bookmark,
a
pencil topper, and about 6-8 layers for 6-8 cards.
Cut as follows:
Turn your sheet so you are measuring the short side (the 8.5" side is
at the top)...hold it this same way throughout the directions below.
1. Mark at 7" and cut (you will have 1.5" strip), then turn and
cut this strip at 10 3/4" (cut off 1/4").
2. Remaining piece: mark at 5 1/4" (cut off 1.75") for a bookmark,
then turn this bookmark piece and cut at 7 5/8".
3. With the leftover piece from the bookmark, cut at 2 3/4"
(should be 1 3/4" long).
4. The large remainder piece: cut at 9 1/8" (1 7/8" strip)...this
is the
layer for cards. Continue to cut as in #4 for more card layers.
***Now, my added description according to the way I do it***
Actually, it's quite easy to create the page you'll use for your
projects.
You take a regular 8.5 X 11 sheet of cardstock and stamp it
with whatever you
want your background to be, and in 2-3 coordinating
ink colors
(I like Little Shapes - a SU! shadow stamp set), stamping
several times
like Barbara mentioned. Then you pick 1-3 coordinating
stamps
and stamp them in coordinating or contrasting colors or black
(see samples
for ideas). You can also use a word or saying stamp
if you like (as in my
Hello Spring card below). Then you take the sheet
and cut it up into various
sizes to use in either cards, bookmarks, bag
toppers, gift boxes, notebook
pad covers, you name it! The "Double
Time" name is due to the many
uses that can come from one decorated
piece of cardstock. So it's actually
a form of collage with a twist on
its uses. That's it! I only make cards so
far because that's all I want
to make. But the options are endless. It's a quick
way to put WOW! in
your cards and such. You can make up a bunch ahead of
time and cut them
up when needed. A great time saver.
Try it!
Here are more samples to
get you going:
Samples 1
Samples 2
Samples 3
|
| The 3 top cards in this column
are basically
the same. I only changed each slightly. I just wanted to show you how
using different stamps in the same way with this technique can achieve
unique results.


Kim MacNutt
Stamps: Botanicals, Little Shapes; CS: Ruby Red, Basic Black,
Naturals Ivory; Inks: Ruby Red, Old Olive, More Mustard, Basic Black;
Other: More Mustard Marker; Embellishment: Pop dot


Kim MacNutt
Stamps: Watercolor Garden II, Little Shapes, Botanicals; CS: Ruby Red,
Basic Black, Naturals Ivory; Inks: Ruby Red, Old Olive, More Mustard,
Basic Black; Other: More Mustard Marker; Embellishment: Pop dot


Kim MacNutt
Stamps: Painted Garden, Little Shapes, Botanicals, Itty Bitty
Backgrounds; CS: More Mustard, Basic Black, Naturals Ivory; Inks: Ruby
Red, Old Olive, More Mustard, Basic Black; Other: Inkworx Air Art Gun; Markers:
Basic Black, Ruby Red, More Mustard; Embellishment: Pop dot
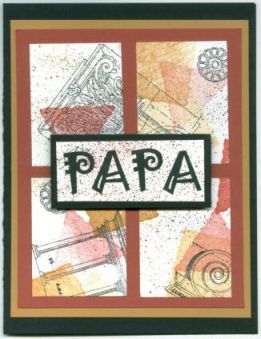

Kim MacNutt
Stamps: Architectural
Elements, Alphabet stamps by Rubber
Nation, Little Shapes; CS: Basic Black, Ruby Red, More Mustard,
white; Inks: StazOn Jet Black, Ruby Red, More Mustard; Markers: Ruby
Red, More Mustard, Basic Black; Other: Inkworx Air Art Gun; Embellishments: pop
dots


Pat Huntoon
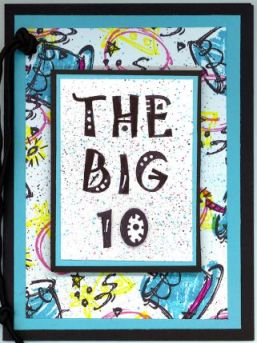

Kim MacNutt


Kim MacNutt
Stamps: Vine & Berry, Botanicals, Little Shapes; CS: Basic Black, Ruby Red, White; Inks: Basic Black, Ruby Red, More Mustard, Old Olive
|


Kim MacNutt
Stamps: Bug Builders,
Bunch O' Bugs; CS: Basic Black, Lovely Lilac, Real Red, White; Inks:
Lovely Lilac, Brilliance Graphite Black, Versamark; Markers: Real Red,
Lovely Lilac; Other: purple EP, Inkworx Air Art Gun, printer (Matisse
font for saying); Embellishments: Black eyelets, pop dots;


Connie Babbert
A very cool gift
tag using Holiday Minis!
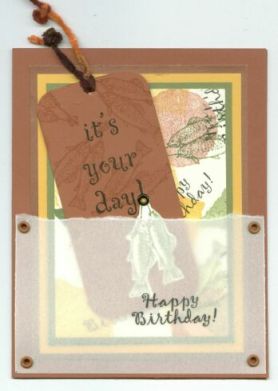

Kim MacNutt
Stamps: Fishin', Little
Shapes, Announcements, Short Sayings; CS: Really Rust, Old Olive, copper
metallic (old SU), Summer Sun, US Vanilla, vellum; Inks: Really Rust,
Old Olive, Summer Sun, Brilliance Graphite Black, Versamark Other: Pearl Ex Spring Green (on fish cut
out on the bookmark); Embellishments: Corner rounder, terra cotta and
black eyelets, fibers, pop dot, paper tearing, vellum tape (to secure
before attaching eyelets)


Kim MacNutt
Stamps: Little Shapes,
Hello Spring, Itty Bitty Backgrounds, All Year Cheer I; CS: Yoyo
Yellow, Pink Passion, Green Galore, white, acetate; Inks: Yoyo Yellow,
Pink Passion, Green Galore, Brilliance Graphite Black; Markers: Green
Galore, Pink Passion; Embellishments: Yellow eyelets, hot pink organdy
ribbon, 1/8" hole punch
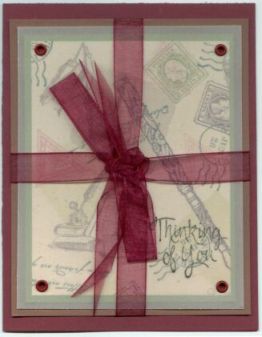

Kim MacNutt
(using a sheet created
by Dana Florence)
Stamps: Letters From Friends, Hero Arts shadow
stamps; Inks: (Shadow inks) Sand, Soft Celery, (Fresco inks) Sicilian
Spice, Amaretto Truffle, (Adirondack inks) Lettuce, Currant,; Brilliance
Graphite Black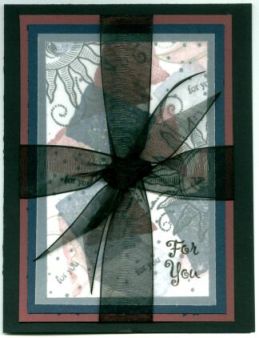

Kim MacNutt
Stamps: Sun, Moon, and
Stars, Announcements, All Year Cheer I; CS: Basic Black, Baroque
Burgundy, Night of Navy, White, vellum; Inks: Brilliance Graphite Black,
Baroque Burgundy, Night of Navy; Other: vellum tape; Embellishments:
Black organza ribbon
|


Kim MacNutt
Stamps: Fresh Flowers, Little Shapes, AYC I;
CS: Real Red, Basic Black, White, Vellum CS; Inks: Real Red, Basic
Black, Lovely Lilac, Summer Sun; Marker: Basic Black; Other: Inkworx Air
Art Gun; Embellishments:
Dimensionals


Kim MacNutt
Stamps: Fresh Flowers, Little Shapes, Birthday
Balloons; CS: Real Red, Basic Black, White, Heavy Vellum; Inks: Real
Red, Basic Black, Lovely Lilac, Summer Sun, Old Olive; Embellishments:
Dimensionals, pop dot


Kim MacNutt
Stamps: Lovely Leaves, Little Shapes, Word stamp by TAC, Definition stamps by
Purple Onion Designs; CS: Basic Black, Orchid Opulence, White; Inks: Orchid Opulence, Sage Shadow, Barely Banana, Basic Black, Versamark; Other: Orchid Opulence, Sage Shadow, Barely Banana markers, Air Art gun, Clear EP; Embellishment: Fiber

Kathy Steinman
(using a sheet created
by
Jo Ann Anders)


Kim MacNutt
Stamps: Cottage Rose,
Little Shapes, All Year Cheer I; CS: Basic Black, More Mustard,
Ruby Red, Naturals Ivory; Inks: Basic Black, More
Mustard, Ruby Red, Old Olive; Markers: Basic Black, Ruby Red; Other: Inkworx Air Art Gun; Embellishments: Black organdy
ribbon, gold wire, heat-crimping of ribbon


Kim MacNutt
Other stamps: Little Shapes, Hero Arts E1118;
CS: Basic Black, White, Real Red; Inks: Real Red, Only Orange, Yoyo
Yellow, Basic Black; Markers: Real Red, Basic Black; Other: Air art gun;
Embellishments: White fibers, Dimensionals, Paper tearing


Pat Huntoon
(notepad)
|


